admin

TFP Shoot vs. Test Shoot

TFP Shoot vs. Test Shoot

What is the difference between a TFP photoshoot and a test shoot? Some would say they are one and the same, however, there is a difference between the two.

A TFP (or “Time For Prints”) photoshoot is a shoot where everyone involved in the photoshoot (photographer, assistants, hairstylist, makeup artist, and model) are all donating their time and effort in exchange for images. While no money is exchanged for this type of photoshoot, it is generally expected of all parties involved in this type of photoshoot to bring their A-Game to the photoshoot to produce usable images for the portfolios of all involved.

Preparing model for the shoot.

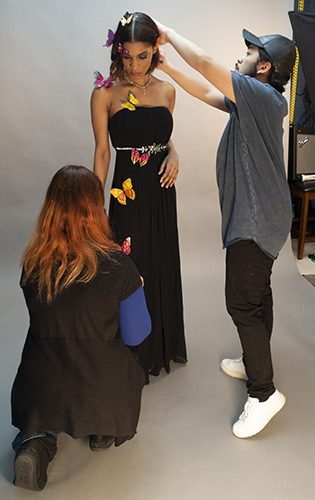
Photographer & Hair/Makeup Artist preparing model for the shoot.

Hair/Makeup Artist – Gil Aldrin; Model – Kristin Rutty

Behind the Scenes Image by Robert Olsen


A test shoot, on the other hand, may or may not be paid. This type of photoshoot is generally set up for one of a few reasons. Perhaps a photographer wants to test out a new piece of equipment or try out a few new lighting styles. A photographer may also be looking to test a new hairstylist or makeup artist. If all involved in this type of shoot perform well, good portfolio images may result and might be shared, but for a test shoot, it shouldn’t be expected to receive images in exchange for time.
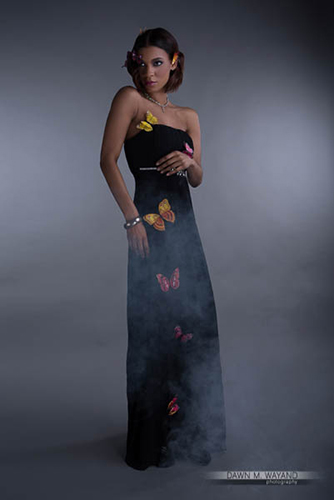
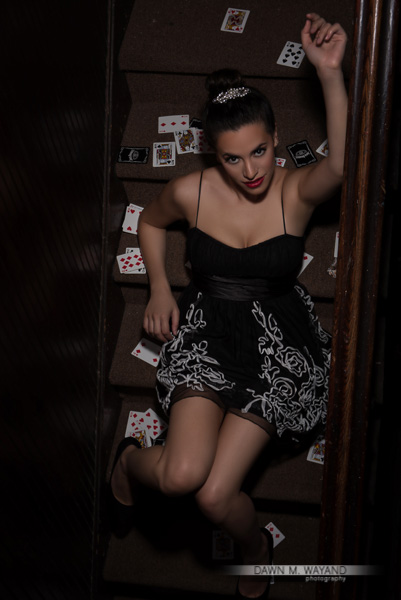
Resulting image.

Model: Kristin Rutty

Image by Dawn M. Wayand Photography


Sometimes, a modeling agency will send a model to a photographer for a test shoot to see if the model photographs well. The photographer may or may not be paid for such type of shoot, however, the agency does expect to receive usable images for the agency’s portfolio for the model.

Regardless of whether a photoshoot is a TFP photoshoot or a test shoot, it’s important to get model releases signed in order to protect all involved and to outline the rights of all parties as to the images that are produced during a photoshoot.

Posted by admin in Models, 0 comments
3 Basic Model Posing Tips

3 Basic Model Posing Tips

Photographers have so many things to stress out about during a photo shoot. They tend to favor a model who knows his or her body and what poses work for his or her look. The last thing a photographer wants to do is coach a model in basic posing throughout an entire photo shoot. As a photographer, we will guide models as to what we want for our vision, but spending more than a minute instructing a model on the exact pose we’re looking for can be very frustrating. Here are a few posing tips that many photographers will be grateful for models having the knowledge of being able to execute during a photo shoot.

Angles. Photographers typically look for geometrical angles in the poses of their models – specifically triangles – as triangles tend to evoke a stronger reaction out of a viewer due to its simplicity and completion of shape in an image. We look for triangles in arm poses, leg poses and 3-person group images.

Triangles in posing.

Dynamic Feet. Both feet pointed in the same exact direction can have an image evoke a feeling that it is 2-dimensional or that it was posed. What I mean by posing feet dynamically is when one foot is posed differently than the other. You might have the subject with one foot pointed outward to one side and the other foot straightforward toward the camera. Alternatively, you might have the subject with one foot arched up onto his or her toes or even have his or her feet crossed. These subtly different types of poses with feet make for a much more interesting composition.

Static vs. dynamic feet in posing.

Symmetrical and Asymmetrical Posing. Symmetry posing works well for straight on photographs of faces in showing that the eyes, nose and lips mirror one side to the other. However, when implementing symmetrical triangular angles in the arms straight on with the camera, especially with women, it can make the model look like a bodybuilder rather than a model posed in a more appealing way. As a model, when placing one hand on your waist, be sure your other hand falls on a hip or somewhere above the waist, whether it’s flowing fingers in the hair or a hand on the shoulder or chest.

Symmetrical and asymmetrical posing.

Practice and implement these three pose techniques in your upcoming shoots, and you’ll not only come off knowing how to work your body, but you’ll also take a little bit of work off of the photographer, which could end up in a call-back for additional work!

Posted by admin in Models, Photography, 0 comments